Monday, November 21, 2011

State of Fermentation


This is a view into the past, about two weeks ago. I used the 26 cubic foot freezer that was going to be a keezer as a fermentation chamber - its been put to good use. 

seen here:
5 Gallons Apfelwein
5 Gallons Grapfelwein
10 Gallons of Graff
5 Gallons of my first attempt at an IIPA
5 Gallons of a Chimay Red Clone

Sunday, November 20, 2011

An Update to my tap addiction


The taps  and handles have been done for a while but I have been so busy with school that I haven't taken any new photos. 

here is the final version, not entirely happy with the drip tray but I don't think I can cut it down without messing up the stainless steel. 

All the lines work, although only 4 of them have kegs on them right now. I just kicked my munich cascade smash - which I will be making again today with a few slight tweaks. 

For anyone interested as to whether or not the salt water chiller is working - it is - and continues to impress me with the fact that a 30 dollar pond pump can do so well in a below freezing high salinity environment.  

Thursday, November 3, 2011

Last of the extracts - found it in my beer tunnel


As you can see this is highly carbonated - I think I over-primed by about an ounce when I bottled almost 2 years ago.

the beer has aged pretty well, no signs of oxidation.

A little background on this beer.

It was a Phat tire clone recipe kit from Northern Brewer that I brewed the same night as I brewed a hefeweizen kit from them. I had two yeasts to pitch and wouldn't you know it I switched them. So I ended up with a brown hefeweizen and a lighter colored ale.

I thought I had gotten them all but this one survived my late night scroungings.

It has a fruity background, a caramel note to it and almost no hop aroma or flavor - I suppose two years of aging will do that.


Friday, October 28, 2011

Brewing in the Snow

As the great pre halloween snow storm of 2011 is nearly upon us - some soap box jockeys screaming 10 inches of snow - I thought it best to make some more beer.

A new brewing associate Aaron and I will be making a batch of "Chimaybe" a Chimay red clone attempt I came up with today. He gave me two bottles of Chimay and I cultured some yeast from one of them


We will also be making two batches of Brandon O's Graff http://www.homebrewtalk.com/f81/graff-malty-slightly-hopped-cider-117117/ which I have made before and loved. This time I will be making an all grain version using .5 ounces of cascade hops, 3 pounds of Pale malt, and 1 pound of munich malt.

I plan on mashing this for an hour then boiling the runoff for 30 minutes adding the hops at the beginning of the boil.

Last week Aaron and I brewed up a low end of the scale DIPA - I used beersmith 2 to work it out, I'm still learning the program so I know there are some errors.

Type: All Grain Date: 10/22/2011 Batch Size (fermenter): 5.00 gal Brewer: Ian Boil Size: 8.24 gal Asst Brewer: Boil Time: 60 min Equipment: Stainless Kegs (10 Gal/37.8 L) - All Grain End of Boil Volume 6.24 gal Brewhouse Efficiency: 72.00 % Final Bottling Volume: 4.25 gal Est Mash Efficiency 86.4 % Fermentation: Ale, Two Stage Taste Rating(out of 50): 30.0 Taste Notes:
Ingredients

Ingredients

Amt Name Type # %/IBU
4 lbs Munich Malt (9.0 SRM) Grain 2 26.7 %
2.00 oz Cascade [5.50 %] - Boil 60.0 min Hop 4 32.6 IBUs
2.00 oz Cascade [5.50 %] - Boil 10.0 min Hop 7 10.7 IBUs
1.00 oz Cascade [5.50 %] - Boil 5.0 min Hop 8 3.2 IBUs
2.00 oz Cascade [5.50 %] - Boil 0.0 min Hop 10 0.0 IBUs
1 lbs Caramel/Crystal Malt - 10L (10.0 SRM) Grain 3 6.7 %
10 lbs Pale Malt (2 Row) US (2.0 SRM) Grain 1 66.7 %
1.00 oz Cascade [5.50 %] - Boil 30.0 min Hop 6 12.5 IBUs
4.00 oz Cascade [5.50 %] - Dry Hop 14.0 Days Hop 11 0.0 IBUs
1.00 oz Cascade [5.50 %] - Boil 45.0 min Hop 5 14.9 IBUs
2.00 oz Cascade [5.50 %] - Boil 1.0 min Hop 9 1.4 IBUs
Beer Profile
Est Original Gravity: 1.078 SG Measured Original Gravity: 1.046 SG Est Final Gravity: 1.020 SG Measured Final Gravity: 1.010 SG Estimated Alcohol by Vol: 7.8 % Actual Alcohol by Vol: 4.7 % Bitterness: 75.4 IBUs Calories: 151.6 kcal/12oz Est Color: 7.7 SRM
Mash Profile
Mash Name: Single Infusion, Light Body, No Mash Out Total Grain Weight: 15 lbs Sparge Water: 5.16 gal Grain Temperature: 54.0 F Sparge Temperature: 168.0 F Tun Temperature: 54.0 F Adjust Temp for Equipment: TRUE Mash PH: 5.20


It is still bubbling away in the fermentation freezer, along with a cascade Munich smash IPA I made the day before.

Friday, October 14, 2011

Boxee!

We finally got rid of cable! in exchange, we got a Boxee Box. You can get the software for free and build one yourself but for $169.99. So far it seems like a good alternative, it requires a bit of learning but doesn't seem to be like an old linux system or anything. I would liken it more to a slightly more complicated version of an On Demand Cable Box.


The remote is really neat with its simple layout and full keyboard.

I also found some third part applications that allow you to use hulu(which has been sadly removed from the official boxee app area) and almost all other tv networks. There are also massive databases of movies and television shows through some off the radar apps - just spend some time looking.

At the moment it seems worth it - no monthly charge, no limits on what you can watch(some shows do cost money but there are ways around that, others are just ad supported which just means that every once in a while there will be an ad. Cool Remote to play with as well.

Tuesday, October 11, 2011

Night Running with the Magicshine

I just got back from a 3 mile run - so out of shape - it took me 29 minutes.


I like running at night because there are fewer people to point and stare and because it is so much COOLER. Winter running is fantastic, but I prefer spring and fall because of the cooler air and pleasant smells.

My constant companion used to be a Gamma Headlamp from Alpkit - a nice little piece of kit but I have had two of them break on me - which the company offered to replace gratis but I am still sad about the product. Now I use a Magicshine light from here: http://www.geomangear.com/index.php?main_page=product_info&cPath=4_41&products_id=314

This thing is the brightest headlamp I have ever used and is a Chinese knockoff of a Lupine lamp that is almost 100% close to the original. The Lupine lamp costs nearly 400 dollars if I remember right. I bought the optional headlamp strap( it was meant to be mounted on bike handles I think) and while it is nowhere near as streamlined as a Tikka it isn't all that bad to run with. The battery pack takes some time to get used to - I strap mine on a chalkbag strap and put that around my waist as tight as I can stand which stops it from moving around.

The magicshine is nearly as bright as a cars headlights and will really make sure motorists don't miss you on the side of the road. I have gotten some weird looks from police officers driving by but so far no arrests for lurking.

On a side note, the website where I bought it issued a recall on the battery packs about 8 months ago, I sent mine in and while it took a really long time I got a nice new(better constructed) battery pack that will not burst into flames.

Happy running

Thursday, October 6, 2011

New Belgium Hoptober


Jus thad this for the first time, and while I am not a giant fan of Hop Bombs(which this is not despite the name) its hoppier than I am prone to drinking/making. Its a really drinkable session(6%) blonde ale with 4 types of hops and some rye thrown in. The bitterness is very low but the aroma is where I imagine the hoptober name came from - got to brew something like this soon. It is delicious. I bought a half rack of it, then I bought some Sierra Nevada Pale Ale(meh) i had to get through the Sierra nevada so I could buy another case of hoptober. It really is quite good.

also - heated pool ahahaha.  

Monday, October 3, 2011

Fridge Cat

This will sound like a question posited by a certain cat in a specific hat however for us to continue on with this I must ask you: Do you have a fridge cat?

Well we do. She pads lightning quick toward any open door, thumping loudly across any floor. She grunts and giggles while struggling to keep you from closing the fridge.


Why she does this we do not know. Any door, be it basement or refrigerator she finds irresistible and rushes toward it with reckless abandon.

Wednesday, September 28, 2011

My long draw beer tower is complete!

check out the full post here: http://www.homebrewtalk.com/f35/long-draw-salt-water-chilled-beer-tower-271578/

I will post up more info later when I am not taking a telepresence course. Needless to say I love having beer on tap in my house.

Tuesday, September 27, 2011

6 Tap Tower Build

the top part of the tower is done, mounted and the lines connected. The 6 line run has been insulated and wrapped and Rylan helped my run it through a hole in the floor behind the cabinet. Its ready, and I drilled a hole in the fridge downstairs to prepare for running all the lines tomorrow. Tomorrow night I should be pulling beer from three taps. Now I need to order 3 more taps!

Saturday, September 24, 2011

DIY Roof rack cross beams

So we have a honda pilot - that we just got back from the autobody shop after a run in with an out of bounds box truck - and while big it barely seats the 7 of us. It seats 8, so we have an empty seat but as the kids get bigger we find room more and more scarce. So when we planned a vacation with all of us we had to consider where we would put all of our junk.

Enter a Thule roof rack from craigslist I snagged for less than half price of retail. It requires crossbars to install- which we lacked until tonight.

Here is a parts list:

2x 1 inch wide by 4 feet wide steel square stock
4x 5/16 U bolts
8 - 5/16th acorn nuts/cap nuts
8 lock washers
3/8th inch vinyl tubing


Fit the bars across the top of the running bars, align the Ubolts and mark where you need to drill

drill holes and fit everything together.

I got the inspiration for this from an Instructables guide sheet, so the credit goes there: http://www.instructables.com/id/DIY-Roof-Rack-Ford-Freestyle/

We tested it out tonight with the roof rack on and there were no weird sounds or vibrations even at 80 miles an hour. I took off the empty Thule box and willow took it to a friends baby shower, she said there was a whooshing sound but nothing annoying - I think its the open ended tubing, something duct tape will fix.

Wednesday, September 21, 2011

The Dangers of Pitching onto a recently active yeast Cake

I brewed up a honey belgian beer a little while ago, and being the thrifty brewer I am decided to pour it directly into a recently emptied carboy with a very healthy supply of yeast from the last brew. So I lifted the kettle, put the tubing on and let it run into the carboy, after it filled I realized I had no airlock so I scampered inside to find one. This is what I found when I returned.
I filled it to the 5.5 gallon mark, and the yeast did the rest...very quickly. A bung and a blow off tube solved this issue but I learned that I should just make a starter from a previous batch and be done with it instead of trying this kind of trick again.

Tuesday, September 20, 2011

Mead Clarification

I brewed up a batch of Mead about 8 months ago, its was a straight mead with just honey and water, I didn't boil the mead and since it was my first attempt I kept poor records. The only thing I have written down goes something like this:

15 pounds clover honey
fill carboy with tap water
add yeast nutrient
add yeast

I know the age is around 8 months and I know it has fermented out because i took a refracotmeter reading(not really accurate at the end of fermentation). But tasting it it was dried out and pretty good. It tastes like it needs some more time to age out but I will do that in the bottle.

The point of this post is that the mead never cleared out. Never. Its been in a 33 degree fridge in the basement for over a month and is as cloudy as it was three months ago. So tonight I started the clearing process with a chitin based clarifier called Super-Kleer KC. Its a chitin( a shellfish derivative)  based clarifier that binds to the gunk(technical term) in the solution and drops it into the bottom of the fermenter. The instructions claim 24 to 48 hours will give you crystal clear results so we will see. The picture below is of the mead when I added the first part of the combination.
I think I will be bottling this in wine bottles and corking them, I was tempted to keg it and have it on tap but I don't think it has aged out enough and I need the fermenter for cider. I want to be able to check the bottles every few months or so until I know I have great simple mead.

Update: around 14 hours or so later the mead is really starting to clear, I will grab some photos tonight around the 24 hour mark and see where it has gotten to. Very impressed with the clearing agent so far.

Sunday, September 18, 2011

Fall doldrums

As my school semester begins and Fall slowly carries away the hot days of summer I find myself in a bit of a blah period. I am up to date on my school work, we are planning a trip to Nags Head in a week or two and I have enough projects to keep me busy for about two months.

But here's the thing: I don't really have the motivation to do any of it. I could blame the constant rain or the beginning of another school year but honesty the truth is far more simple. I have been sitting on my ass far too much. It is hard, not impossible, to stay active when you have small children around. I haven't gone running any distance since our 5k with Coral, and I haven't lifted weights or done sprints in longer than that. Why? I put one foot in front of the other and - just in the wrong direction.

Willow and I went for a walk with Finn and Maelle tonight, Maelle lasted almost the entire time without getting upset: thanks to Finn singing and playing with her in our double stroller.

I suppose this means that i have to start running again. At one point I was up to 10 miles at a clip but I have fallen off the wagon. I don't really lose my distance abilities from what I have seen, I just get really slow. Time to start High intensity interval training otherwise known as run super fast for 1 minute jog for another minute repeat until near dead.

Wednesday, September 14, 2011

Pumpkin Pie Ale with Whipped Cream Vodka

That's right, I am adding vodka to beer. So is Willow. The beer, an attempt at a Southern Tier Pum King Clone, clocked in at around 8% alcohol on its own, adding a shot of this makes it a powerhouse of a drink.

The taste is great, its like drinking a slice of pumpkin pie topped with whipped cream - I would like to say I came up with it myself but that distinction lies with someone who works at the Henlopin Oyster house in Rehoboth Beach. 


Give it a shot, there are some great pumpkin beers out there and its a great excuse to try them!

Po' Boys Creole & Fresh Catch - and some beer


On our way down to Rehoboth Deleware we stopped at the best Cajun place I have ever been. Po' Boys Creole & Fresh Catch - its in a little strip mall type place along the road with limited signage. Inside it smelled amazing - the food was fantastic and they had a wide variety of beers. I tried a Dixie Blackened Voodoo Lager. 

Was it good?
yes, it was cold and the mug was frosty. But I expected a darker lager. I poured a bit on the light side and had a nice amount of head for a lager. The hops and malt were on the lower side of the flavor profile and there was an odd sweetness to it that while not bad would not make me buy a case of this beer. I could drink a few on a back porch on a summer night but I think I would prefer my own lagers to this one. Still good though.

True to form, I had a catfish Po boy. well worth the trip - best place we ate all weekend.

If you go down that way try to stop by.

Wednesday was Pizza Night


I gave up flour about 5 months ago, gave up beer and most rice, all sugars, and all things processed. No cheese, no pizza, no tacos, no tortillas.

I went Paleo- I felt great and I lost 25 pounds over a period of a few weeks. I slowy left 100% paleo and started putting other things back into my diet. Last night I made pizza for the family and I ate some. It was delicious despite me knowing what it is.

So now I eat sushi and of course I make and drink beer- even when I go back to paleo I won't give up my own beer.

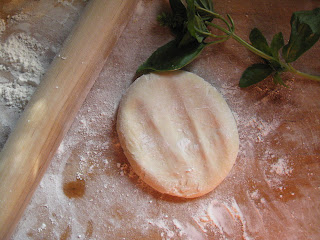
Anyway enough of that crap. I mad amazing pizza last night. Simple margharita pizzas, 6 of them with home made crusts, sauce and garden basil.

Dough Recipe:

5 cups   or all-purpose flour
1 3/4  teaspoons salt
1 tablespoon instant yeast
1/3 cup olive oil
1 3/4 cups very cold water( i put ice cubes in mine)
more flour for rolling and dusting


Combine dry ingredients in kitchen aid mixer bowl, then add wet ingredients and mix on medium-high until the dough pulls away from the sides.  
remove from bowl onto floured surface
cut into 6 equally sized sections
I form mine into nice little spheres and set them on a parchment paper covered cookie sheet and into the fridge for at least 4 hours - 24 hours is ideal!


take them out, flour a cutting board/ work area and roll them out. they make beautifully thin pizzas!


Will make six 12 inch pizzas.


The sauce was simple: I blended up some garlic a few roma tomatoes and a bunch of basil. It was amazingly good. 


These are best if allowed to work overnight in a fridge, ours only had a few hours to work but they were great . 

The Car Accident!

 So this happened last week, as a result we are driving a dodge caravan - hooray free rental!

The day was rainy and i was driving beneath an interstate underpass, a box truck pulled out a few yards in front of me and despite my turning away and braking we met and the result is the image below.
They other driver was completely at fault - I know this because our car is getting fixed by their insurance, our car seats are being replaced, and we got a free rental for two weeks( its a van, but its a brand new van)

Yes, even our car seats are being replaced - more precisely we are being reimbursed for whatever car seats we buy to replace the ones that were in our Pilot at the time of the accident.

I was the only one in the car, and I was fine. I was able to drive home and finally make breakfast- which was why I had gone to the store to begin with.

Drive safe everyone!

Monday, September 12, 2011

A Six tap glycol chilled stainless steel Perlick Draft Tower Squid Thing

It arrived in a box advertising diapers. Surrounded in newspapers and with its tentacles bent so it looked like a happy octopus mixed with the terminator.

It came from a Festhaus in Florida, as near as I can tell this was some kind of beer garden chain that went under a few years back. anyway, its awesome.

It will live on top of my keezer in the next few months and I hope to be using my new forward sealing perlick 525ss to pour by booze.

Thursday, September 1, 2011

Turkey!


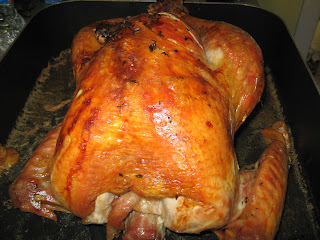
I can't take those beautiful food pictures yet, I am lazy and my camera kind of sucks. But this turkey was really good.

Recipe:

1 turkey- ours was around 15 pounds
Kosher Salt
Butter
Fresh Sage
Fresh Thyme
Wine
1 Head Garlic

Instructions for turkey:
1. Take your turkey, remove the giblets and set aside. dry turkey.
2. Rub the turkey with a generous amount of kosher salt( i used three tablespoons for the entire turkey)
3. Let sit for at least an hour in the fridge
4. Remove turkey from fridge, insert a bunch of fresh thyme and fresh sage into the turkeys ....cavity. Preheat oven to 450 F.
5. Take butter(1 stick) and rub all around between the breast and the skin, make a little pocket for it.
6. break up garlic cloves and place on the turkey breast.
7. Add turkey to roasting pan, to the pan add 2 cups of water and 1/2 cup of wine
8. Drizzle olive oil over turkey to aid in browning and crisping.
9. Insert turkey into oven
10. cook until internal temperature is around 180( it took two and a half hours for us) in the thigh meat
11. remove from oven and let rest for 10 minutes before pouring off juices

Instructions for gravy:
After the bird is done cooking let it rest for 10 minutes
Pour off pan drippings.

Pan drippings are your gravy, no flour/cornstarch needed.

Fruit and Failure

That title is a bit misleading. Yes there was fruit and there has been a lot of failure, but in the end there has been success, of sorts.

The first build of my cider press did well for what it was; a somewhat poorly designed box frame with little structural support and a lack consideration of where the forces of a 4 ton bottle jack had to go. The lack of heavy lag bolts and strong supports led to cracking lumber and broken dreams.

The solution? Break it down and build it again.
Where is the failure in learning from your mistakes, what wrong is that?

The wrong in this case was not mine, at least not in the building or dismantling part.

Finn decided to help me as he often does when I venture outside to avoid schoolwork and house work. He was diligently picking up the discarded wood screws and placing them back into the screw box( often doing so quickly because the friction from removing them had caused them to glow with the heat of 2 suns). I paid him no mind when he started stacking lengths of lumber a few feet from me- just Finn being a kid and puttering about I thought.

Then  BAM! right in the brain box.
The sky grew brighter and pain welled up behind my eyes, I put my hand on my forehead to staunch what I thought was surely grey matter, set my jaw, and clenched my eyes tightly together to fend off the urge to tear up.

I want to say I was silent when this happened, stoic enough to take my punishment( for not wearing a helmet apparently), and simply walk it off. But I wasn't. I was weak, that or I hadn't been drinking enough to numb the pain. Bringing my hand down from my head I saw blood and the world heard my confused rage in the form of language that would make a sailor take notice.

Luckily I think Finn was shocked enough by what had happened that he didn't pick up anything,  or Willow would have keelhauled me.

After it was all over and I had an unnaturally blue icepack pushed against my forehead I could finally laugh about it, willow on the other hand had been laughing about it since I stumbled in to tell her what our little assault child had done to me. I guess I will be wearing my caving helmet whenever I work outside with Finn now.

so the failure here:
Finn cracked me in the head with a 2x4, there is a 1 inch gash in my forehead. I may have said something loudly that shouldn't be uttered in the presence of children and women.

Success:


Before the press gave up the ghost I managed to get 3 gallons of good grape juice out of it, I sulfited it and put it in a bucket and will be making wine from it today i hope. The skins also got some sulfite and will be used to make a table/cooking wine.


Finn and Willow helped me pick these earlier, it took only three hours to pick and destem 50 pounds of grapes- the picking i had help with( at times too much Finn help) - the destemming I had to do alone while I watched episodes of BrewingTV on my thinkpad.

Note: destemming grapes is a very boring and sticky business.

Success: The new press I build is one based heavily on things I found online. I should have just bought plans to build one, the videos i watched showed the press working great - mine required lots of tinkering and reinforcing as well as an entire day to complete. (the one I refer to is called a Whizbang Cider Press and is very well reviewed) I should have just bought the plans and saved myself lots of time and aggravation. In the end the press I ended up with( at least for now) seems to be able to take a lot of pressure and doesn't make too many unnerving creaking noises when I press stuff. I managed to do some apples from our trees last night and got a good 1/2 gallon of juice really quickly. I used an old pillowcase as a pressing bag- its a high thread count one from somewhere that we just didn't like. I worked really well - the juice was much clearer than the juice I made before, and despite the apples not being quite 100% ripe the juice was good and kid approved.

This might look like them getting home on the first day of school, but I assure you this is their "the cider meets our standards" dance celebration. really. Abrial is even so blinded by the deliciousness that she has to close her eyes.


Also: its painted the same color as our house - Thanks whoever left paint in our basement!

so to sum up:

It takes 80 pounds of grapes to get 5 gallons of juice - I had 50 and got 3.
A toddler armed with a 2x4 is bad news - wear a helmet.

Sunday, August 28, 2011

House Amber Ale Tasting

So I brewed ten gallons of this stuff about 5 months back. It primaried in a massive 15 gallon hdpe barrel and I bottled it all with the help of Abrial- with whom sanitizing and filling became a joy. (perhaps it was just nice to have help for once.

Grain Bill:

14 Pounds Canadian 2 Row
4 Pounds Canadian Munich Malt
5 Pounds Crystal 30L Canadian Malt

Hops:
2 Ounces Cascade Whole Leaf Hops @ 60 Minutes
2 Ounces Cascade Whole Lead Hops @ 5 Minutes
1 Ounce Cascade Whole Leaf Hops @ Flameout

Note: The bitterness is there( which I like because this beer is quite malty) but I should have dry hopped it for a few days as well.

Yeast: I used US-05. Its a good all around yeast that ferments out pretty clean.

Fermentation Schedule: Fermented at Room temperature - about 62 degrees - for two weeks.

Mash Schedule:

Single Infusion to mash at 153 for 60 minutes

Sparge at 172 for 20 minutes


Appearance: The beer pours a nice red amber color with about three fingers of foamy head that dissipates within a few minutes. Carbonation is a bit over where I want it, my fault as I primed with a bit too much dextrose. As long as you pour immediately after opening and into a large enough glass its not an issue.

Taste: This is one of the better mainstream style beers I have made. Usually I tend toward the saison and Belgian direction but this is great on a hot summer night. Its malty and crisp with enough backbone to balance out the large hop additions. Its very drinkable and the carbonation plays nicely with fuller body.

Nose: nice smell of cascades, malty and somewhat yeasty- yeasty in a good way but I would prefer it without, probably because I didn't cold crash this one. It was before I had the ability to coldcrash- before acquiring a freezer and a fridge for "extra food". I think willow saw right through that ploy.

I have about 1.5 cases of this stuff left, and while I wait to get all the parts for my keezer I will be milking the bottled beer I have and letting some of the bigger beers I made age out - many of them still have that high alcohol rocket fuel taste that big beers have for the first few months.

On that note I think I need to make some smaller beers soon.

Fruit Press Basket Complete

So I went out and bought a can of Watco Butcher block sealer for my wood press components. I put about 5 coats of this stuff on the basket and press plate. it looks great and now I can be assured the basket will last a long long time. The tin says to wait 72 hours before using the sealed wooden object so I can finally use it tomorrow.
Willow checked our grapes tonight during our pre dinner tennis excursion and they are sweet and so dark they look black. Tomorrow is the day to pick them. I think I am going to make a nice big red wine and maybe a second wine with the leftover skins to use as a table wine or a cooking wine. I have a lot of bottles to fill. Thank goodness I bought an Italian floor corker.

Unfortunately, like many of you, my lovely children are going to school tomorrow so I will lose my able but not always willing outdoor servants and child watchers. This will make picking fruit much more difficult. This means that they will get up early- 6 am, and come home around 2:30 pm. Over the summer their schedule was more like get up at 9 and go to bed at 10:30 or 11 with a possible nap in between- and these are 11 year olds. I finally got some better family photos last week after everything greened back up and before the Irene rain dumping from the last few days.
 In the photo above: Rylan in red, Finn, Abrial, Jalene holding Maelle
The obvious addition here is willow.

Wednesday, August 24, 2011

New Cider press basket

I picked up this basket today, it cost 75 bucks and came with a press plate and a bunch of spacers for pressing. I need some butcher block oil and I will get it finished so I can press my grapes in a few days. for scale there is a nice frosty mug of Apfelwein - the mug is a very tall two pint mug. The basket is 12 inches in diameter.


the quality is great, I feel as though I could stand on top of it and it would be just fine - in fact the guy that made it for me made it last night on really short notice and told me I could stand on it.

His stuff was sturdy and well made, plus I got to pick it up so I didn't have to pay for shipping - saved me about 25 dollars.

here is his artfire website, this is a plug for his stuff because he sold me something that was well made and couldn't have been nicer. He even had two border collie crosses that wanted to fetch a ball and get constant attention so I got some dog time while I was there.

Tuesday, August 23, 2011

Cider Pressing Matter

Over the last year I have plotted and schemed trying to justify buying a cider press. I found someone locally that makes and sells them but the prices are high: around 300 dollars if I remember correctly. Shopping craigslist and the local classifieds brought up a handful of fully functional antique presses for around 500 to 1000 dollars. Clearly I had to do something else.

So two days ago Willow took all the kids except Rylan to some kind of gathering and I decided to build something.

After scowering the web I found many people using scissor car jacks and 4 or 8 ton hydraulic jacks. Luckily I bought a 4 ton hydraulic jack at Harbor Freight a few weeks before.

The plan, as it sits, is to gather apples either from our back yard of to buy bushels of seconds from a local orchard and use those. They will be cored and pulverized into an applesauce like product, placed into a nylon mesh bag and pressed using the jack and some bucket sized plywood circles.

I had planned on sanding and varnishing everything with food grade wood varnish but then my laziness took over and I made a snap decision not to do it. Instead I plan on placing food grade plastic on everything that the apples/cider will touch. this way I can simply add plastic when the press is in use then throw it away when we are done.


I checked out apples today and they are about two weeks from ripe so I went and bought some drops from a local place. Three bushels got me almost three gallons of cider, even though my process was very inneffecient. It tastes great and the kids liked it. I contacted a local guy about making me a proper basket for the press, I need to cut a few more pressing disks and I need to find some material that will let me create the cheeses and have them stay where I want them.

If you research the term " pulpmaster" you will find a delightful product sold in the UK, I couldn't find it here in the states) that works to chop apples in a way that might work better than my blender idea. I bought a few things at the hardware store today and will be making one for myself over the next few days.
Our grapes are almost ripe as well, and hopefully this press can do double duty as a grape press. Two years ago we picked 120 pounds of grapes but being novices we picked them too early and got slightly tart grapes. This year I am going to wait until the birds start eating them and then pick them, as I was instructed to do by many an internet sage.

The video I made of the press seems to be to large to load, even after letting the page sit unattended overnight. So I will post it to youtube and set it up here in the future.

In the video above I stated I used three bushels of apples, looking at what a bushel is I realized what I bought were half bushels.

Sunday, August 21, 2011

Grap-felwein experiment #1

So I bought a surplus of apple juice at a local bent and dent and set about making a prodigious amount of booze from it.

5 gallons of anything sounds like an awful lot but really that only fills about 2 cases of beer bottles plus a few more. So out of a 5 gallon batch of anything I get around 54 twelve ounce bottles of home made hooch.

Two cases of carbonated beverage - or one 5 gallon keg - doesn't necessarily last two adults very long. Especially if those adults happen to have 5 wonderful children. In that case 5 gallons isn't nearly enough.
Here is the link to the original recipe and a lot of discussion on it.

http://www.homebrewtalk.com/f25/man-i-love-apfelwein-14860/

This batch is an experiment. If you look for Apfelwein you will find a long series of posts dedicated to it on homebrewtalk.com, the recipe came from a guy calling himself EdWort. This stuff is great. Willow loves it because it sits happily around 10% alcohol and takes about 1 glass to give a healthy warming feeling. More than that and its a speedtrain to giggletown. I like it carbonated but I did cork 24 wine bottles worth of the stuff about three months ago. One bottle is left and that has been promised to a currently pregnant woman who wants to drink it when she becomes unpregnant in a few weeks.

My adulteration of EdWort's recipe is as follows:

2 pounds Dextrose
3.5 gallons Apple juice - only other additives allowed are Vitamin C as it doesn't interfere with fermentation
1.5 gallons Grape juice with only Vitamin C added - I used welches and juicy juice
Yeast: I used champagne yeast because its what I had on hand

The carboy on the right is the Grapfelwein, on the left is the straight laced apfelwein.


We tend to drink ours young, I shoot for waiting at least 3 months but I hear that waiting longer is better. 

Ian's Vanilla Cinnamon Mead

So I whipped up a quick mead last night. 5 gallons of great smelling booze that should end up between 10 and 12 % alcohol. It will be a doombringer that tastes like liquid satin.

Recipe for Ian's Vanilla Cinnamon Mead
12 pounds local honey
4 whole vanilla beans
4 all spice berries
1 cinnamon stick
1/2 tsp ground cinnamon
Water to 5 gallons

Yeast: White Labs sweet Mead Yeast WLP720

I dissolved the honey in 130 degree water and added the stick and ground cinnamon and allspice. I allowed it to steep for 20 minutes before racking into a carboy leaving the cinnamon stick and allspice berries behind.

Racked into carboy and added 4 vanilla beans and filled to 5 gallon mark with cool water.

Pitched starter of WLP720 and yeast nutrient and yeast energizer according to the directions on the bottle.

It should ferment out within a few months and in 6 months should be ready for drinking. maybe even before that. Mead usually takes a little while to clear out and for all the flavors to meld appropriately.

The carboy is shaped oddly because after a really long brew day- I think it was 1 AM, I didn't chill my wort and just poured into a carboy(rookie mistake), it mushroomed like this but it still works - just holds 5 gallons instead of 6.


Wednesday, August 17, 2011

Garden Bed Experiment: Hugelkultur

It really is quite fun to say: hugulkultur - its a fancy way of saying a raised garden bed that is made by putting down dead wood- preferably rotten - covering it with upside down sod, leaves, dead grass, compost and a layer of topsoil.

Pennsylvania has nice spring and fall seasons- winter is grey and cold with little snow and summers start off nice and end up with arid desert like conditions. This is what brought me to this idea. Hugelkultur is a type of permaculture bed design that provides massive amounts of nutrients and water in times of drought and dry weather. The wood breaks down releasing nutrients to the plants and it absorbs massive amounts of water during rainy periods which is released back into the soil when the plants need it most.

So since I had some beds that dried out really quickly I decided to create my own version of this gardening style. I started by digging out the beds and throwing the topsoil and other stuff onto a tarp in a path. I stopped digging when I was tired of digging...which didn't take very long. Then I put down a few logs, branches, and sticks I had lying about and a thick layer of maple wood chips that had a large population of angry ants. On top of that went another thick layer of mushroom mulch and on top of that will go the top soil I removed.
Here you can see that about 2/3 of the way through the digging I decided to pull some old broccoli and add it to the mix. At this point I raked it all out then started adding layers of wood

Finn decided he wanted to hit tennis balls at me.


 Finn and Abrial dragging some branches that fell during our last wind storm. In the second picture I think Finn looks as if he is driving a mule.

It's messy and there are some Swiss Chard plants that I allowed to live but the bed is taking shape. I covered the wood scraps with wood chips then covered that with mushroom mulch. Tonight after the temperature goes down this evening I am going to cover it with the top soil I removed and give the entire thing a healthy soaking. Hugelkultur beds are supposed to be mounds, but mine is more of a somewhat rounded pile. I hope it works as I really miss having greens and I bet garlic would do great in this kind of bed.

When we started out gardening we build eight 4x8 foot beds out of rough hewn hemlock and filled them with turned sod and mushroom compost. They tend to dry out quickly but we have tried amending them with grass clippings, leaves, and other compost. This is my attempt to see if hugelkultur is something that could work on a large scale and work for us when we put in a more permanent garden.


Fresh Tomato Ketchup

Fresh Tomato Ketchup

We used Romas because we had lots of them and I thought they would make a great ketchup. and they did.

3 lbs. ripe tomatoes
1 Medium Onion Chopped
4 Cloves of Garlic Chopped
1/4 cup Brown Sugar/Honey
1 Tbs Dry Mustard
1 tsp ground allspice
1 tsp fresh ground black pepper
1.5 Cups Apple Cider Vinegar
1 heaping tsp of cayenne pepper - add less if you like it less spicy

This is the basic recipe we used, we threw the entire tomato, minus the stem into the vitamix. Yes, I included seeds and skins. After much internet perusing I found many references to the nutritional and taste benefits found in the skins and seeds of tomatoes, so I decided to be super lazy and benefit my family by doing nothing other than pulverizing the Betelgeuse out of them.  we made a huge batch- starting off with 24 pounds of Romas and adjusting this basic recipe from there.

The picture below is after the tomatoes and spices have cooked down for about 4 hours with constant stirring- be sure to keep it moving so it doesn't stick. When it has reached this wonderfully thick consistency - imagine what you want your ketchup to be like then boil it down until you get there, take it off the burner and process your canning jars in a standard water bath. We added 1 tbs of lemon juice per pint and filled them up to about 1/2 inch from the lip of the jars. Immerse in the water  bath canner and boil for 30 minutes. I usually have a great deal of luck with my jars sealing, but this time two didn't seal. they went into the fridge and one is already gone.

I ran ours through the vitamix again just to make sure everything was pulverized and the consistency was right.

I believe, if memory serves, we got 17 pints of delicious home made ketchup out of 24 odd pounds of fresh tomatoes. We don't really use ketchup in our house, mostly because of the nasty crap that goes into the manufacturing process- HFCS, lots of sugars, Dyes, etc. With this ketchup though, and the kids like it quite a bit, I don't feel bad giving it to them for a condiment.

Monday, August 15, 2011

Fall Greens

So this summer has been a bit of a disappointment as far as rain goes. Early summer was great, we got rain all the time and we hardly had to water at all- which is good because we suck at watering our plants -but mid and late summer have been very very dry. Even weeds are having problems growing and the grass has been fried by the sun to the point where if I walk outside without shoes I come back in with sooty looking feet.

This week brought rain, and lots of it. Our rain tank was full and the grass has started to green up again. Yesterday we cleaned out our two kitchen garden raised beds and planted lots and lots of leafy greens. Maelle helped while Finn was taking a nap, she decided the hose was of the greatest interest and at one point thought her four might misaligned teeth could chomp through it.


We tried to get baby Maelle to let us plant more, placating her with an empty seed packet. Willow had given her one before this one which she thought was empty, turns out it wasn't and we ended up cleaning up lots of seeds. I found the best method, by the way, is not to pick them up individually, but instead it is to wet your hands and press them down onto the seeds making them stick. then just shake all your seeds onto the soil and everyone wins.
 We also found some really pretty little peppers while adding more compost, unfortunately I was weeding and pulled them out, oh well they make for a nice picture.
 You can see some of our sunflowers, we get these pretty little yellow birds that I am almost 100% sure are Goldfinches. They love the seeds and are often seen peering into our back windows. Willow claims she could never grow sunflowers before, apparently that curse has been broken. They look a little sad but our recent rain is perking them back up. They smell great too.
Spinach, Lettuces, other stuff I forget but Willow remembers. It all went in on top of a new layer of nice dark mushroom mulch which I promptly soaked over and over again. Willows instructions were : Keep this wet all the time.

I'm really looking forward to having garden greens again, the harsh summer meant all of our lettuce bolted or turned so peppery it was inedible.